0:00
So let me show you what we building
0:01
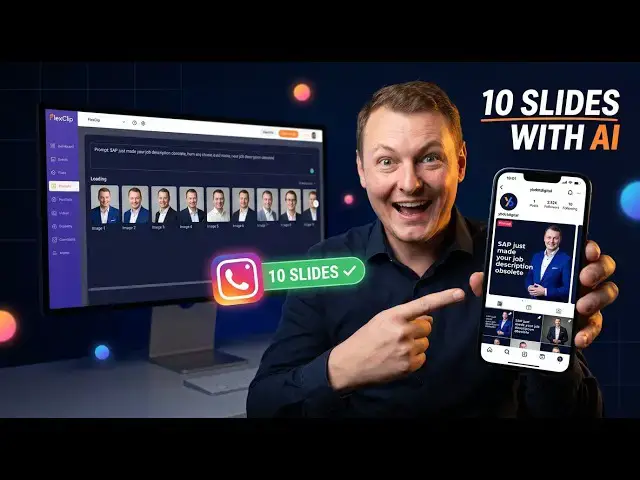
today. This right here is my Instagram
0:03
profile at yb.digital. And this carousel
0:06
pinned as a very first post on grid. The
0:08
one that says SAP just made your job
0:10
description obsolete or your carryer
0:12
untouchable that was created entirely
0:14
with the eye. 10 slides. Professional
0:17
photography style consistent branding
0:19
throughout. And today I'm going to show
0:21
you exactly how I made it step by step
0:23
using cloud and flex clip. The link to
0:26
flexc clip is in the description at
0:28
yb.digital/flex. digital/flex.
0:30
Now the first thing I did before
0:31
touching any image tool was sit down
0:33
with cloud and build out the full prom
0:35
package for the carousel. And I want to
0:37
show you what that looks like because
0:38
this is honestly where most of the
0:40
creative work happens not in the image
0:42
generator but in the brief. I gave
0:45
Claude the context about my Instagram
0:47
account. The YB.digital digital brand,
0:50
the audience which is digital
0:52
entrepreneurs broadly angle which is
0:54
building an audience from what you
0:56
already know. And Cloud came back with
0:58
10 individual image generation proms,
1:00
one for each slide plus the full
1:03
Instagram caption and a first command
1:07
Each image pront is incredibly detailed.
1:09
It specifies the background style, the
1:11
typography treatment, what text goes
1:14
where, the color palette using my exact
1:16
cobal blue, the layout, whether my face
1:19
appears or not, everything. This is the
1:21
foundation that makes the wolf thing
1:23
work. When your prompts are this
1:25
specific, the output looks intentional
1:28
rather than random. Now, let's go
1:30
generate those images. Head over to
1:32
flexclip yb.digital/flex digital/flex
1:35
and from the main dashboard go to AI
1:37
tools then select text to image. The
1:41
first thing you notice is are quite a
1:43
few models to choose from. Flux to Kine
1:45
is selected by default but if you open
1:48
the model selector you see a whole list.
1:51
Biden dream, Open AI GPT image Flux to
1:55
Max Google Nano Banana Cling and several
1:59
each one has different strengths and
2:01
different resolution options now that
2:04
makes a real difference for this kind of
2:06
project reference filter buttonil
2:11
show mod support reference image input
2:14
meaning you can upload photo of yourself
2:16
and the model use to generate images
2:20
Without this getting generic people with
2:23
this getting your face in a professional
2:28
for personal brand carous not optional
2:31
essential going with Google nan bananana
2:34
for this one support 4k resolution
2:36
reference images and the output quality
2:39
portrait photography style is excellent
2:42
in the first image prom from cloud the
2:45
style to photo since we want a realistic
2:47
photographic look not an illustration
2:50
headshot reference image. This is that
2:53
mod incorporate likeness into the
2:56
generated images for the ratio selecting
2:59
4 to explain why because this is
3:02
actually really important for Instagram
3:04
specifically. If you look at my profile
3:06
grid the first pin carousel is 4 to5 and
3:09
you can see the full image in the sunlil
3:12
all the text is visible the composition
3:15
The next post is a one to one square and
3:17
it's slightly cropped. Then all the
3:20
standard videos are 9 to 16 vertical and
3:23
those get crpped quite heavily in the
3:24
grid sunl for a carousel your text is
3:27
part of the visual design where the
3:29
headline needs to be readable on the
3:31
grid. 4 to5 is the right coal. It give
3:34
you more vertical real estates and a
3:36
square without going full portrait. The
3:38
text stays visible the face stays
3:40
visible and it looks clean on the
3:42
profile grid. All right, let's generate
3:45
the first image. I click generate. And
3:47
now we wait. Each image takes a little
3:50
time to process. And since we're
3:52
creating 10 slides, I need to do this
3:54
one at a time. Paste the prompt,
3:56
generate, wait, then move to the next.
3:59
I'll keep showing you the process, but
4:01
we speed up the repetitive parts so you
4:03
not sitting here for half an hour. The
4:05
food generation process for all 10
4:07
images took me to around the 10 and a
4:09
half minute mark. So, just keep that in
4:11
mind when you're planning your own
4:12
session. Why images are generating? Let
4:15
me pull up the cloud conversation so you
4:17
can see the full output it gave me.
4:19
Beyond the 10 image proms, it also wrote
4:21
a complete Instagram caption. The one
4:24
that starts with the SA announcement
4:26
hook talks about AI agents running
4:28
finance and procurement automatically
4:30
makes the point that this doesn't kill
4:32
SAP jobs. Its SAP jobs held by people
4:35
who never truly understood the system.
4:37
And then the personal credibility
4:40
15 years implenting SA across countries
4:45
that combination of a strong hook
4:46
counter intuitive take and personal
4:48
proof is exactly what makes carousel
4:52
built all of that from the brief I gave
4:54
it. It also wrote the first comment with
4:57
all the hashtags SA, SAP safire,
5:01
autonomus enterprise, joule, S forana,
5:05
SAP consultante, AI agents, future of
5:08
work, SAP training, ERP, already to copy
5:13
paste straight in. Now while we here I
5:15
also want to show you Flex Clips full AI
5:18
tool section because there's a lot more
5:20
here than just text to image. Under the
5:22
popular tab, you've got AI image to
5:24
video, AI text to video, AI photo
5:27
editor, AI text to image which we using,
5:30
AI image to image, AI all photo
5:33
restoration and AI headshot generator
5:36
under image there are even more options.
5:38
This is a proper AI creative suite. Not
5:41
just one trick. Everything you need to
5:43
produce professional visual content is
5:44
in one place. Go set up your free
5:47
account at yb.digital/flex
5:49
and explore what's there. Though I'll
5:51
note that the image generation we are
5:52
doing today does use credits rather than
5:54
being completely free. So factor that in
5:56
when you're planning your workflow. All
5:58
right, all 10 images are done. Let's go
6:00
to the history tab to see everything
6:02
that was generated. I can review each
6:05
one here, check the quality and then
6:07
download them. I'll grab all 10 and save
6:10
them to my computer. Now here's the
6:12
practical tip. I learn the hard way when
6:14
uploading to Instagram. Download your
6:16
images from last to first. So slide 10
6:19
first, slide 9 second, all the way down
6:22
to slide one last. The reason is when
6:25
you upload multiple files to Instagram,
6:27
it orders them by file date with the
6:29
most recent file first. If you download
6:32
in reverse order, your files will
6:34
naturally sort so that slide one ends up
6:36
first in the upload queue without any
6:39
manual reordering. If you download in
6:42
the normal order like I did here, you
6:44
need to manually drag and reorder all 10
6:46
images in the Instagram uploader, which
6:49
is exactly what I'm about to do now. So,
6:51
learn from my mistake and save yourself
6:53
a few minutes. I'm creating a new post
6:56
on Instagram, selecting all 10 images,
6:58
and choosing the original ratio option
7:01
to preserve the 4 to5 format. Then I go
7:04
through and reorder the slides by
7:06
switching back and force between the
7:07
flexc history tab to check which slide
7:10
is which and the Instagram drag and drop
7:12
list to get them in the right sequence.
7:15
It takes a few minutes but it's worth
7:16
doing carefully. The order of a carousel
7:19
is part of the storyting and if the
7:21
slides are out of sequence the whole
7:23
thing falls apart. Reorder done. Now I
7:26
go back to the clot conversation and
7:28
copy paste the full caption directly in.
7:30
I read through it once more to make sure
7:32
everything looks right. The hook lens
7:34
the credibility is there. The call to
7:36
action at the end is clean. Happy with
7:38
it. Hit share. Post is live on
7:40
Instagram. I reload the page and there
7:42
it is on the grid. Looking exactly right
7:45
at 4 to5. The text is fully readable in
7:48
the thumbnail. The composition is
7:51
I open the post and add the first
7:53
comment with all the hashtags straight
7:55
from cloud. Now one thing I can do from
7:57
the desktop browser is pin the post to
8:00
the top of my profile. For that need the
8:02
mobile app. So I switch to my phone,
8:04
open Instagram, find the post, tap the
8:07
three dots and select pin to profile.
8:10
Back on desktop, I reload the page one
8:12
more time and there it is. The carousel
8:14
is no pinned as the first post on the
8:16
YB. Digital grid. clean, professional
8:19
fully branded and made entirely with AI
8:22
tools. Cloud for the strategy and copy.
8:24
Flex clip for the image generation.
8:27
That's a full workflow. If you want to
8:29
create your own professional Instagram
8:30
car the same way, the link for flex clip
8:33
is in the description at yb.digitalflex.
8:37
Start with a free account, explore the
8:39
AI tools, and when you're ready to
8:40
generate images at this quality level,
8:42
the credits are well worth